Most of us place buttons on our blog:
- to show that we've been featured
- to show what projects we're taking part in
- or just because we like something.
What ever the reason, most of these buttons originate from someone else's blog. As intended by the button owner, we copy the button code and put it somewhere on our blog, often into our sidebar.
The button attributes are determined by the code:
- alignment
- whether it opens in the same or a new window
- and sometimes, the size of the button.
What this means for you, is that buttons will probably not line up, they will probably be different sizes and they may or may not open in a new window.
I've previously shown you how to:
To make the buttons align in the example above, I've taken out any code that determines the alignment. If there is no code to determine alignment, the buttons will align to the left.
<a target="_blank" href="http://www.createhopedesigns.com/" title="Create Hope Designs" title="Create Hope Designs"><img src="http://button_location/createhopebanner1.jpg" style="height: 150px; width: 150px;" border="0" alt="Create Hope Designs" /></a><a href="http://hopefulthreads.blogspot.com" target="_blank"><img alt="sew with heart 3 by Hopeful Threads"src="http://button_location_m.jpg" width="150" height="150" /></a><a href="http://sewdelightful.blogspot.com/"target="_blank"><img alt="Sew Delightful" src="http://button_location/button2copy.jpg"/" /></a><a border="0" href="http://dressagirlaustralia.blogspot.com/" target="_blank"><img src="http://button_location/blogspot.jpg" style="height: 150px; width: 150px;" /></a>
Have you seen our ongoing themed link parties?
Master list of ongoing link parties at Threading YOUR Way with Threading My Way
Today, I'll show you how to align buttons. Again, the code you copy will determine whether the button aligns to the left or the centre.
I have absolutely no experience with coding. This is what I have learnt by looking at code and experimenting. It is not necessarily the best way to code, just what works for me. As always, back up your work before you experiment with coding. (Copy the code, create a new post and paste the code into the new page. Don't publish the copy.) Here's how I align buttons...
Here is the code for a button with centre alignment:
<center><a border="0" href="http://xyz.blogspot.com/" target="_blank"><img src=https://button_location/button.jpg></a></center> OR
<div align="center"><a border="0" href="http://xyz.blogspot.com/" target="_blank"><img src=https://button_location/button.jpg></a></div>
And the same button with no alignment, so it will align to the left:
<a border="0" href="http://xyz.blogspot.com/" target="_blank"><img src=https://button_location/button.jpg></a>
You can see that all you have to do, is to take out the code in pink above. You must make sure you take out both the beginning and ending code. Usually the code will be <center> ..... </center> or <div align="center"> ..... </div> but occasionally you will see other code. The same will apply, take out the beginning and ending code.
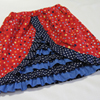
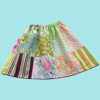
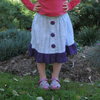
Here are some buttons from my sidebar. I've made sure each button opens in a new window and I've resized them, if necessary so they are all 150px x 150px. This code won't work if you paste it onto your site, as I've shortened the button locations to make it easier to read.
 | <a target="_blank" href="http://www.createhopedesigns.com/" title="Create Hope Designs" title="Create Hope Designs"><img src="http://button_location/createhopebanner1.jpg" style="height: 150px; width: 150px;" border="0" alt="Create Hope Designs" /></a>
<a href="http://hopefulthreads.blogspot.com" target="_blank"><img alt="sew with heart 3 by Hopeful Threads"src="http://button_location_m.jpg" width="150" height="150" /></a>
<a href="http://sewdelightful.blogspot.com/"target="_blank"><img alt="Sew Delightful" src="http://button_location/button2copy.jpg"/" /></a>
<a border="0" href="http://dressagirlaustralia.blogspot.com/" target="_blank"><img src="http://button_location/blogspot.jpg" style="height: 150px; width: 150px;" /></a>
|
| If you look at this example above, you will see that the code for each button begins on a new line. If you run the code together, with no spaces in between, the buttons will be in lines, as below. |
<a target="_blank" href="http://www.createhopedesigns.com/" title="Create Hope Designs" title="Create Hope Designs"><img src="http://button_location/createhopebanner1.jpg" style="height: 150px; width: 150px;" border="0" alt="Create Hope Designs" /></a><a href="http://hopefulthreads.blogspot.com" target="_blank"><img alt="sew with heart 3 by Hopeful Threads"src="http://button_location_m.jpg" width="150" height="150" /></a><a href="http://sewdelightful.blogspot.com/"target="_blank"><img alt="Sew Delightful" src="http://button_location/button2copy.jpg"/" /></a><a border="0" href="http://dressagirlaustralia.blogspot.com/" target="_blank"><img src="http://button_location/blogspot.jpg" style="height: 150px; width: 150px;" /></a>
- The first example is how I do my buttons in my sidebar.
- The second example is how I do my buttons on my Parties page, except that the buttons on my Parties page are 100px x 100px.
As you can see in the second example, the code gets run together and can be rather hard to read. It is very easy to make a mistake!!! Back up ~ Back up ~ Back up!!! When I started doing my Parties page like this, I copied the html into a new page I created, specifically as a backup. ie; I had a Parties page and a backup Parties page. I made sure that the backup was up to date before I added a new button.
NB: You may notice that I have used two different spellings for the one word... centre and center
- In examples of code, I use the spelling ~ center
- In text, I use the Australian spelling ~ centre
I hope this is of help if feel you would like to tidy up your buttons.
... Pam
... Pam
Have you seen our ongoing themed link parties?
Master list of ongoing link parties at Threading YOUR Way with Threading My Way


so good to know! It bugs me when my buttons are all over the place.
ReplyDeleteThanks for the great info ~ your descriptions are very clear which as a new blogger I really appreciate! Im off to organize my blog :)
ReplyDeleteGreat post, thanks! Gotta get round to doing this! Tash
ReplyDeleteThank you for posting this! This blogging world I've stumbled upon is as confusing to me as it is wonderful. This will really help.
ReplyDeleteAnother great tutorial Pam!
ReplyDeleteThanks for linking to a Round Tuit!
Hope you have a fabulous week!
Jill @ Creating my way to Success
http://www.jembellish.blogspot.com/
Awesome tutorial - thank you!
ReplyDeleteVery smart blog trick! Consider sharing with my readers at http://sassafrassalvation.blogspot.com/2012/02/sasss-sunday-salvation-show-11.html !
ReplyDeleteHappy Valentine's Day,
Kathy
very useful tips, thanks :)
ReplyDeleteGreat tips, again! Put a link to this post on my most recent blog post
ReplyDeletehttp://4you-withlove.blogspot.com/2012/02/blogging-tips-4.html
Marilyn
Thanks so much for this info! I hated that my buttons went anywhere they wanted to! ;^)
ReplyDeleteJulie @ http://www.craftyimaginings.blogspot.com
Great tips! I remember how helpful it was when I figured some of those things out and how much neater it makes a blog look! I'd love for you to share here:
ReplyDeletehttp://oneartmama.blogspot.com/2012/02/shine-on-fridays-14-and-some-fabulous.html
What a great tip!! Would love for you to share!
ReplyDeletehttp://www.pincushioncreations.com/2012/02/homemade-by-you-link-party-1.html
Thanks for sharing!!
ReplyDeleteIt's not hard to learn HTML at all and there are a million qualified sources. It's a good thing to know if you're going to blog.
ReplyDeleteI'm self-taught in CSS and HTML and have advanced to building my own layouts and templates now. It's not that difficult once you learn the ropes ヅ
Thanks! I knew how to align them vertically, but was wondering how to do it horizontally, so you answered that for me! Such a cute blog you have. My daughter loves to sew, so I am going to tell her about it too. I'm a new follower.
ReplyDeleteThank you so so so much! My buttons are all over the place and it drives me crazy! I will get to work on this right away and my page will be so much prettier!
ReplyDeleteThat's great advice! Thanks so much! I'm off to my blog to try it out now!
ReplyDeleteWow, I never really knew what was up with my buttons, this is very informative and helpful. Love your blog wallpaper so pretty. My favorite hobby is sewing so I'll be checking in often. My fingers are crossed that you will share this at Sunday's Best going on now.
ReplyDeleteI featured this at the Stache Party! http://mylilpumpkinpatch.blogspot.com/2012/02/stache-party-1-features-and-my-good.html
ReplyDeleteThank you so much! The tips you shared are so helpful (I never even realized that my buttons opened in the same window) and you made everything so easy to understand.
ReplyDeleteAmy @ http://yellowhouseon3rd.blogspot.com/
Oh my gosh!!!! I have got to do this. It drives me nuts when the buttons don't line up. Thank you so much for sharing with us this week!:)
ReplyDeleteMore great blog tips!! This is something every new blogger should read! Thanks for sharing at oopsey daisy!
ReplyDeleteThanks for sharing at Bacon Time!
ReplyDeleteThank you so much for sharing this... will be lining up my buttons if only the kids will leave me alone and let me do it!
ReplyDeleteI can't wait to try this! I wish I had seen it earlier, but I saw you at "These Peas Taste Funny" today! Thank you so much!
ReplyDeleteThanks, Pam. This has been really helpful!
ReplyDeleteWow Thanks for sharing this! It's helped with my Party buttons. Although my buttons aren't sitting next to each other even with removing the alignment. Any thoughts? Thanks
ReplyDeleteLisette
Northern Belle Diaries
THANK YOU, PAM! This is so awesome. YOU are so awesome for sharing this.
ReplyDelete