


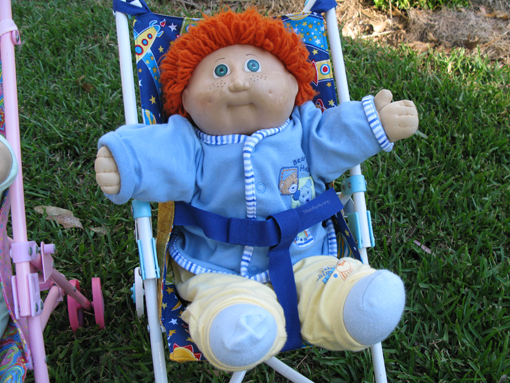
The frames seem quite durable and outlive the stroller linings. Today's tutorial will show you how to make your own new lined doll stroller liners.
Materials
Make pattern pieces by unpicking the seat and the back of the old stroller liner. The original liner was unlined. To make the new liner stronger, it's lined with a contrasting fabric. I used quilting cottons for both the main fabric and the lining. Cut 2 backs (main fabric and lining) and 2 seats (main fabric and lining), plus the following:
- 1 piece - 3.25" x 9.25" (8.25cm x 23.5cm) ~ lining fabric for pocket to attach seat to stroller. Measure the width of your stroller seat. It may be different to mine. 9.25" is the width.
- 2 pieces - 4.5" x 1" (11.5cm x 2.5cm) cotton tape ~ straps for handles
- 1 piece - 7" x 1" (18cm x 2.5cm) cotton tape ~ 1st strap for seat
- 1 piece - 6" x 1" (15cm x 2.5cm) cotton tape ~ 2nd strap for seat
- 1 piece - 9" x 1" (23cm x 2.5cm) cotton tape ~ bottom strap for seat
- 1" x 3/4" (2.5cm x 2cm) piece of velcro
- All seams are 3/8" (1cm), unless otherwise indicated.
- I've used the words back and seat to refer to the two main parts of the stroller liner. The back is the top part the dolls lean against and the seat is the bottom part they actually sit on.
- The pocket is the rectangular piece of fabric underneath the seat, used to attach the seat to the stroller.
Sew the handle straps:
- Fold strap in half lengthwise and topstitch

Attach handle strap to back of stroller liner:
- Fold handle strap in half
- Place the folded strap on the top of the exterior back, 3/8" (1cm) from the side edge (right side of main fabric).
- Hang strap over the edge by 1/8" (3mm).
- Sew strap to back (right side of main fabric).
- Sew back and forth over the straps a couple of times (between seam line and edge of fabric), to reinforce.
- Zig zag the raw edge of the strap.
- Repeat for the second handle strap.

Attach side straps:
- Place the side strap 4" (10cm) from the bottom of the back (right side of main fabric).
- Hang side strap over the edge by 1/8" (3mm)..
- Sew side strap to back (right side of main fabric).
- Sew back and forth over the straps a couple of times (between seam line and edge of fabric), to reinforce.
- Zig zag the raw edge of the strap.
- Repeat for the second side strap.

Sew back of stroller exterior to lining:
- Place lining on exterior, right sides together, tucking the straps in between.
- Sew across the top.
- Sew side seams, starting at the top.
- Sew back and forth over the straps a couple of times (between seam line and edge of fabric), to reinforce.
- Neaten edges.
- Turn right side out.

Sew pocket to underside of seat:
This strip of fabric holds the seat in place. The two outside pockets that you will stitch, will go over the stroller. You will need to measure the width of your seat, so your measurements may vary slightly for this section.
- Hem one long edge. Turn under 1/4" (6mm), then 1/2" (1.5cm).
- Place the seat lining fabric, right side up.
- Place the pocket, also right side up, on top of the seat lining fabric, raw edges together.
- Sew along the top raw edge with a 1/4" (6mm) seam.
- Sew along the sides with a 1/4" (6mm) seam.
- Sew through both layers 1.75" (4.5cm) from the sides. Backstitch securely.
- Sew a 2nd row of stitching very close to the 1st.
- Sew along the hem line, between the two rows of stitching. Don't sew along the hem where the two pockets will be.

Attach bottom seat strap:
I forgot this step on the first stroller liner, hence the different fabrics.
- Place the bottom strap on top of the seat lining and the pocket, in the middle
- Hang bottom strap over the edge by 1/8" (3mm).
- Sew bottom strap to seat lining.
- Sew back and forth over the strap a couple of times (between seam line and edge of fabric), to reinforce.
- Zig zag the raw edge of the strap.

Sew seat exterior to lining:
- Place the seat lining and the exterior, right sides together, with the strap in between.
- Sew the side seams from the top straight edge to the hem line of the pocket that is sandwiched between.
- Sew across the top straight edge.
- Neaten seams.

This photo shows you where to sew to, but you will be sewing with both lining and exterior fabrics together, so you won't see the fabric pocket. Put a mark on the wrong side of the fabric to show where to stop.

This photo shows the actual sewing, with the arrow showing where the stitching stops.
Sew back to seat:
- Beginning at the end of the side seam on the seat exterior, pin the curved edge of the seat to the bottom edge of the back exterior. You are NOT sewing the pocket.
- Continue pinning the lining seat and back, leaving a 3" - 4" gap. (7.5cm - 10cm)
- Baste (hand sew) and remove pins.
- Begin sewing the exterior at the pocket flap and sew around to the other pocket flap. Do NOT sew the pocket flap.
- On the other side of the pocket flap, sew the lining, remembering to leave a gap.
- Remove basting stitches.
- Neaten edges.

The arrows show where to start and finish joining the seat lining to the back lining, BUT you will have already sewn the exterior seat. This photo is just to easily show you where to start and finish.

Baste seat to back, both lining and exterior. This photo shows the back of the liner. The seam, showing in the middle, is where the back lining and exterior are joined at the top.

This photo shows the seat side. The flap I am holding is the pocket which hooks onto the stroller. Do NOT sew the pocket.

Sew up to the flap on both sides
Turn right side out:
- Put your fingers through the hole in the bottom of the lining.
- Gently pull the exterior out through the lining.
- Don't close the gap just yet.
Reinforce seat seam:
- Finger press the seam that joins the seat to the back (exterior fabric). It doesn't really matter if you press to the seat or the back.
- Topstitch 1/8" (3mm) from seam.

Close gap in seat lining:
- Baste (hand sew) the gap closed.
- Close the gap in the lining by sewing a row of stitching near to the edge.
- Reinforce with a fine zig zag stitch.
- Remove basting stitches.


Topstitch stroller liner:
- Topstitch 1/8" (3mm) from the edge all the way around the stroller liner.
Straps:
- Turn under all raw strap ends 3/8" (1cm).
- Stitch with a straight stitch, then zig zag a couple of times.

- Turn a 2" (5cm) hem on the bottom strap.
- Sew, backstitching at either end. Do NOT sew the loop that is formed. This is the part of the belt that the other straps will feed through.

- Turn a 1" (2.5cm) hem on both side straps.
- Securely sew a 1" (2.5cm) piece of velcro to each of the straps; the top of one and the underneath of the other. Place the velcro 1/4" (6mm) from the end. Sew a square with a cross to firmly secure. Backstitch to start and stop.


Congratulations!!! You have sewn a doll stroller liner that should last a lot longer than the original.

The tutorial may be rather long, but making the stroller liner isn't that hard. I can assure you, writing the tutorial took MUCH longer than sewing the stroller liners.

Part of the tutorial were hard to explain. If the instructions are difficult to understand, look at the pictures and this will hopefully make it clearer.

These doll strollers will be joining the 170+ projects in the ongoing Softies, Dolls & Toys link party, here at Threading My Way.

If you make a Doll Stroller Liner using this tutorial, I'd love you to share pics in the Threading My Way ~ Sewn by YOU Flickr group, leave me a link in the comments or share a photo on Facebook.
... Pam
Tweet
What a fabulous project Pam. Kids do love pushing strollers!
ReplyDeleteThis looks much stronger than the liners that come with them, too! I might have to see if I can do something like this to my regular stroller.
ReplyDeleteThe smartest strollers around :)
ReplyDeleteSmart! The liners are my biggest complaint. They tear and rip so fast. This would make a much nicer doll stroller!
ReplyDeleteI'm so glad that you shared this tutorial as I have 2 doll strollers that are pretty much torn to pieces and I had been contemplating just trashing them. Thanks, Pam!
ReplyDeleteThanks for the tute. I have a little grand daughter that would love one of these on her stroller!
ReplyDeleteI only wish I had some little girls, only grandsons(which we adore).
ReplyDeleteI have 4 grandsons and one grand daughter, so spoil her shamelessly, mind you, the boys too!
DeleteGreat idea! I'm pinning it for future reference.
ReplyDeleteTeresa
www.keepingitrreal.blogspot.com.es
Thanks for pinning, Teresa!
DeleteWish it had a print now available, my husband is moaning that I use up all his ink, HIS INK, I bought it, hahahaha
ReplyDeleteYeah, it is rather long, isn't it, Tina. Making my tutorials into PDFs is on my To Do list. I need more hours in each day! Have fun with the tutorial.
DeleteThis is a very helpful tutorial. Thanks for sharing! water heater repair company denver co
ReplyDelete"Measure stroller seat dimensions. Cut fabric for front, back, and padding. Sew front and back together, leaving an opening. Insert padding, then stitch closed. Add Velcro straps for attachment. Customize with decorative stitching or patterns. Ensure liner fits snugly. Enjoy a refreshed, comfy doll stroller look!" Lawyers are experts in interpreting and applying the law to provide advice and representation to clients in various legal matters.
ReplyDeletelawyer for motorcycle accident
best family court lawyers near me
Great post! I always check mcw live score updates to stay on top of every match in real time. Your insights make it easier to follow key moments, player performance, and quick score changes without missing any action at all.
ReplyDeleteMCW sign up
While discussing creative hobbies and tutorials, it is always nice to find reliable ways to relax on your phone. For those looking for a stable mobile interface, you can bet on aviator pakistan which is a very popular choice throughout Pakistan. This platform is well-optimized for local networks across Pakistan, ensuring a smooth and responsive experience for any user looking for quality entertainment while they work on their DIY projects.
ReplyDelete