


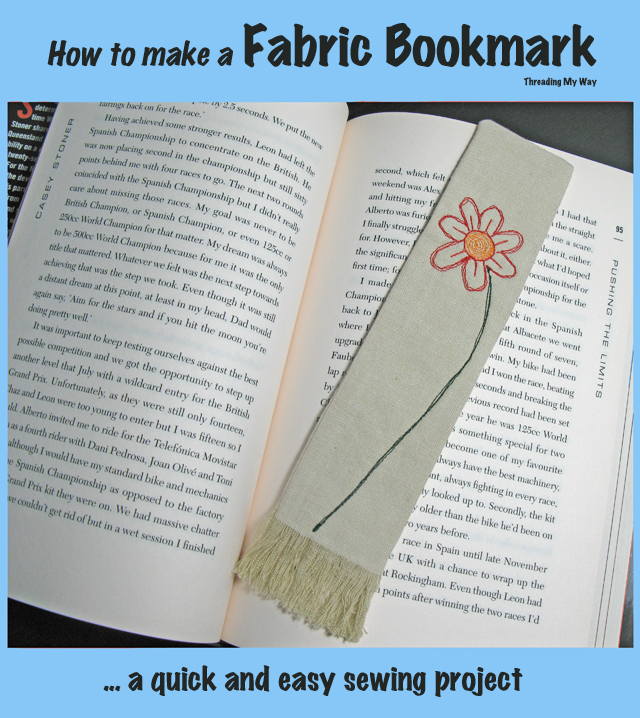
A fabric bookmark is a quick and easy sewing project - so much better than bending over pages to mark your place. Today's tutorial will show you how to make a fabric bookmark with frayed ends and a machine stitched flower.

Materials:
- 2 pieces of fabric 9" x 2½" (23cm x 6cm)
- 2 pieces of lightweight fusible interfacing 7½" x 1⅞" (19cm x 3cm)
I used cotton fabric about the weight of quilting fabric, but with a looser weave. It's not linen, but looks a little like it. I think linen would be perfect for this project.

- Follow the manufacturer's directions and fuse the interfacing to the wrong side of the fabric.
- Leave a gap of ⅜" at the top.

- Fray the bottom edge up to the interfacing.
I needed to re-fuse the ends of the interfacing after fraying. You could always do the fraying first, then fuse the interfacing.

- With right sides together, stitch around the two sides and the top.
- Backstitch to start and finish.

- Clip the top corners being careful not to cut the stitching.

- Turn right side out.
- Push the corners out gently. A chopstick is a handy tool to have here.

- Press
You could stop here, especially if you've chosen patterned fabric.

- Lightly draw a flower shape. My pencil lines ended up being covered by the stitching.
- Change to an open toe embroidery presser foot, as it will allow you to more readily see your stitching as you create the flower.
- Decrease stitch length. I reduced mine to 1.8. The smaller stitch length will allow you to more easily sew small curves.
- Sew a spiral to fill in the centre of the flower.
- Sew three times around the petals. You are aiming for a scribbly effect, so vary the path of the lines.
- Sew twice around the centre with a contrasting colour and then twice to form the lines in each petal.
- Sew the stem three times.
My machine has a needle up/down button and I used this a lot for the flower. If you don't have a needle up/down button, just go slowly.

- Each time you start and stop, reduce your stitch length considerably and backstitch. The smaller stitches won't show as much as larger stitches.

That's all there is to it. A super quick project you can easily make in an evening.
This cute little bookmark is another gift ready for Christmas. I think fabric bookmarks would be terrific gifts to give to teachers. Who would you give one to?
... Pam
Tweet
If you think others would benefit from reading this post, feel free to share on social media.
Love this bookmark! My book club members will be getting some for xmas. I'm not good at the machine sewing, but I'm sure I can find an embroidery design to use. The fabric and fringe make it rather sophisticated!
ReplyDeleteThis is so cute! This would make great gifts for loved ones!
ReplyDeleteThanks for sharing, Pam.
As I was reading your post, I was thinking that fabric bookmarks would make a great Christmas gift....just like you said! Love the flower embroidery and the fringe!
ReplyDeleteBeautiful! How about the back of the bookmark - is it untidy with the back of the stitching? Ive never done embroidery on a machine, so excited to have a try! Thank you for this. Kirsty
ReplyDeleteGood tutorial and nice idea to make it. Yes, a wonderful handmade gift.
ReplyDeleteThanks so much, Terriea.
DeleteReally fun bookmark, Pam! Thanks for sharing your idea!
ReplyDeleteThis is so pretty Pam! I love the machine embroidery on it - and a great idea for a stocking filler gift!
ReplyDeleteWhat a great, quick project for a gift or giveaways! Thanks for the idea.
ReplyDeleteI've never thought to make a fabric bookmark, although we often make card ones with the children here in our activity hour. I love the step by step instructions and the frayed end. Popping by from Creative Monday
ReplyDeleteCute! Thanks for sharing.
ReplyDeleteThis is such a gorgeous bookmark! I'm one of those naughty people that turn ears on my books but that's because I don't have a good bookmark!
ReplyDeleteWhat a cute bookmark Pam, thanks for sharing!
ReplyDeleteSo pretty! No machine over here, but great inspiration none the less. Pinning it!
ReplyDeleteGreat tutorial Pam, lovely bookmark :)
ReplyDeleteThanks for sharing at Creative Mondays
I think this would be great for Venetia to try out some machine embroidery, and I think she'd love to give them to teachers, as well as Grandparents, Great Aunts and quite possibly book loving friends too.
ReplyDeleteHi there
ReplyDeleteJust stopped by to let you know that I featured this on my Round Tuit post this week!
A Round Tuit 277
Thanks again for linking up! Hope you have a great week!
Jill @ Creating my way to Success
That's so pretty - thanks for the tip about shortening the stitch length - I usually forget to do that, then I get very angular curves, which is, of course, not the intent, lol!
ReplyDeleteWhat a fast and nice gift idea Pam!
ReplyDeleteThanks for linking up to Ho, Ho, Ho and on We Sew too
Why do you not do the machine embroidery before putting the book mark together? Then the bobbin thread would be hidden.
ReplyDeleteIf you don't want the stitching to show on both sides of the bookmark, you could just as easily do the embroidery before putting the book mark together.
DeleteThe Fabric Bookmark with Stitched Flower is a handcrafted bookmark made from fabric, featuring a decorative, stitched flower design. It combines functionality with creativity, serving as a unique and personal accessory for readers. These bookmarks are often used as gifts or personal projects, showcasing sewing and embroidery skills.
ReplyDeleteharrisonburg reckless driving lawyer
manassas reckless driving lawyer
I absolutely love this fabric bookmark with the stitched flower! It’s such a beautiful and creative way to add a personal touch to your reading. The delicate stitching makes it look so unique, and it seems like a perfect gift idea as well. I can't wait to try making one myself! Thanks for sharing this wonderful tutorial.
ReplyDeleteindecent liberties with minor
aggravated indecent liberties with a child
Threading My Way is a sewing and DIY craft blog that shares tutorials, sewing projects, and creative ideas. It features step-by-step guides, patterns, and tips for making clothes, accessories, and handmade items. The blog inspires readers who enjoy sewing, crafting, and creative home projects.
ReplyDeletejaguar service
land rover service