


Grab your fabric scraps and offcuts, to make a useful little drawstring bag. It's a quick and easy project that will help you bust some of the little pieces of fabric you've been collecting. Today's tutorial will show you how...
Materials:
- 1" (2.5cm) strips of fabric - enough to make 14 strips roughly 16" (41cm) long - for the exterior of the bag
- 1 piece roughly 7" x 15" (18cm x 38cm) - contrast colour for the lining. Do not cut the lining fabric till the patchwork fabric is sewn.
- 2 lengths of cord, tape or ribbon 18" - 20" (45cm - 51cm) - drawstring cords

Instructions:
All seams are ¼", unless otherwise indicated.
I didn't need to use any pins when I made this bag. If you find you need to pin the seams...
Make Patchwork Fabric:


Sew Lining:
Increase stitch to regular length. I set mine to 2.4.


Secure Drawstring Cord Opening:


Topstitch Around Top of Bag:
Make Drawstring Casing:


The cords might be a little hard to pull the first couple of times. If you find this happens, just pull and loosen a couple of times.
I didn't need to use any pins when I made this bag. If you find you need to pin the seams...
- pin
- baste (hand sew with a long stitch)
- remove pins
- stitch seam with machine
- remove basting
Make Patchwork Fabric:
- Reduce stitch length to make the patchwork fabric. I made mine 2.0.
- If you have one, use a ¼" quilting foot. Make sure to change back to a regular foot for any zig zagging - seam neatening - otherwise you'll break the needle.
- Seams are ¼". This will result in the 1" strips of fabric becoming ½" when sewn.
- Cut strips of fabric 1" wide and random lengths.
- Join together to make strips roughly 16" in length.
- Press seams to the side.
- Arrange sewn strips in a pleasing pattern.
- Sew strips together.
- Press seams to the side.
- Square and trim. Mine ended up at 7" x 15" (18cm x 38cm).
- Cut lining to the same size as the patchwork fabric.
- Sew ⅛" from the edge across both the top and bottom edges (small sides), to prevent the stitching from coming undone.
Sew Lining:
Increase stitch to regular length. I set mine to 2.4.
- Fold lining in half, right sides together.
- Sew the first side seam.
- Sew the 2nd seam, leaving a gap of roughly 2" - 3".
- If you neaten the edges with a zig zag stitch, make sure you take off the ¼" quilting foot and change to the regular one first, otherwise you will break a needle. I didn't bother to neaten the edges of the lining.
Sew Exterior Fabric:
- Neaten the long edges of the patchwork fabric. Make sure you take off the ¼" quilting foot and change to the regular one first, otherwise you will break a needle while zig zagging. I wouldn't skip neatening the edges for this step, as it will prevent stray threads from coming out with the drawstring cord.
- Fold patchwork fabric in half, right sides together.
- On both sides, measure and mark 1½" (4cm) and 2" (5cm) from the top edge. This will be the opening for the drawstring casing. The width of the opening will depend on the width of the cord. If in doubt, make the opening larger rather than smaller.
- Sew from the top edge to the first mark. Backstitch to secure.
- Backstitch as you start and sew from the second mark to the bottom.
- Repeat for the other side.
Secure Drawstring Cord Opening:
- Sew back and forth a couple of times at both ends of the opening, with the seam open.
- Stitch the seam on either side down. You are basically sewing a square around the opening.
Attach Lining to Exterior of Bag:
- Place the bag inside the lining. ie: the right side of the bag is next to the right side of the lining.
- Line up the top edges of the lining and the exterior.
- Hand baste (long running stitch) the lining and exterior together.
- Sew the top edges of the lining and the patchwork fabric. I sewed a ⅜" (1cm) seam, but a ¼" seam would be fine.
Turn Bag Right Side Out:
- Put your fingers through the hole in the bottom of the lining.
- Gently pull the right side of the bag out through the lining.
- Edge stitch the gap in the lining closed, or you can hand stitch if you would prefer.
Topstitch Around Top of Bag:
- Push the lining back into the bag.
- Press the top edge of the bag.
- Topstitch ⅛" (3mm) from the edge, around the top of the bag, using a slightly longer stitch. I set my machine to 2.8
Make Drawstring Casing:
- Stitching through both the exterior and lining, sew around the bag, starting and ending at the top of the opening for the drawstring. Line up the the edge of the bag with something on the machine to help keep the stitching straight.
- Repeat step 1, starting and ending at the bottom of the opening for the drawstring. Line up the second row of stitching with the first row.
Cords:
- Using a safety pin, thread the first cord through the entire drawstring casing. Both ends of the one cord will come out of the same opening.
- Repeat with the second cord and the second opening.
- Knot the ends of each cord.
The cords might be a little hard to pull the first couple of times. If you find this happens, just pull and loosen a couple of times.

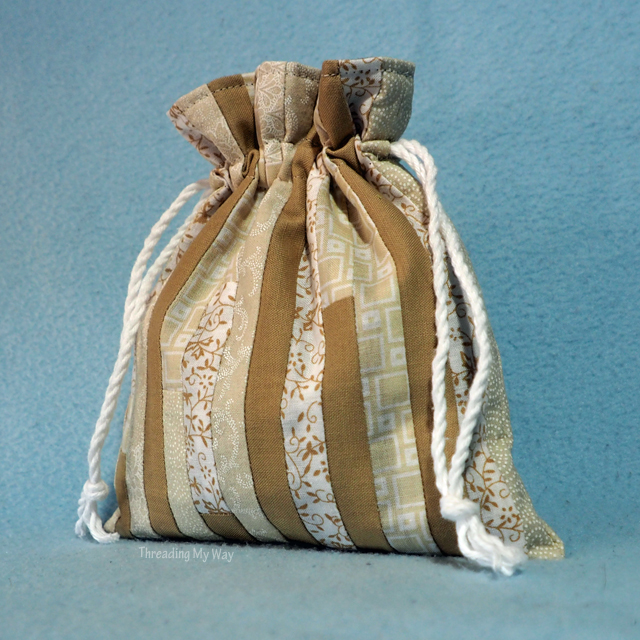
The finished bag ends up at 6" x 7" (15cm x 18cm).

If you make a patchwork drawstring bag using this tutorial,, I'd love to see photos:
- Leave me a link in the comments
- Add to the ongoing Drawstring Bags link party, here at Threading My Way.
- Tag me on Instagram - @threadingmyway
- Send me an email - link at top right of blog
- Contact me on Facebook
- Add to the Threading My Way ~ Sewn by YOU Flickr group
Last November I made this little bag, fully intending to write the tutorial soon after, and add it to the 12 Days of Christmas Challenges Gift Wrapping link party. I deliberately didn't make it in Christmassy colours, so the recipient could use it throughout the year.
Just as well, because I didn't give it to anyone. I kept it so I could have it on hand while writing the tutorial.
Two questions for you today...
- What would you pop inside this little bag as a gift?
- What would you use the bag for if given to you?
... Pam
Because of the drawstring cord, this bag is not suitable for children under 3 years of age.
| Tweet |
That is such a great idea for using smaller scraps! I've got a Craft Gossip post scheduled for tomorrow afternoon that features your tutorial:
ReplyDeletehttp://sewing.craftgossip.com/?p=91489 --Anne
That's very pretty ... but ... are we really supposed to USE the lovely scraps we collect??!! I thought they were to be kept on display! Hehe just kidding - I love my scraps and that's a great way to showcase a collection of the prettier ones :)
ReplyDeleteWonderful as always Pam! I like that you used scraps to make this bag. I could certainly use up some scraps to make some of these too. Thanks!
ReplyDeleteGreat tutorial Pam! An awesome bag and a great scrapbuster!
ReplyDeleteSounds like that instruction to change the foot is coming from the voice of experience Pam! It has taken several snapped needles on my Bernina to remind me to change the needle position when I set it for a zigzag stitch :)
ReplyDeleteYour scrappy drawstring bag would be a great storage bag for all manner of lovely things!
This is lovely, Pam. Further to our previous discussion, this is another one of those projects that I can see doing with scraps but until I have the same beautiful scraps as you do, it's not gonna happen quite yet!
ReplyDeleteA wonderful use of small scraps of material and you make the finished gift bag look so pretty. I'd be thrilled to receive something in one of these.
ReplyDeleteThank you for sharing on #Trash2Treasure
A fab way to use up some of your fabric scraps. I love giving presents in homemade wrappings. #Trash2Treasure
ReplyDeleteI LOVE this bag!!
ReplyDeleteThank you for writing thiss
ReplyDelete